You have done all your research... probably woke up early and drove some distance to put yourself in that perfect spot to capture that breathtaking image..but does it end there? Do you let all that hard work go to waste in the post processing end of things?
There are a million different ways to edit your images but it is just as important as taking that perfect shot. I personally use Photoshop CS6 to edit my RAW files and I wanted to share with you a very simply to use tool in Photoshop to give your image that extra pop.
The tool is called Shadows/Highlights and it can be found in any version of Photoshop under Image>Adjustments>Shadows/Highlights. A menu will pop up as seen in the image below.
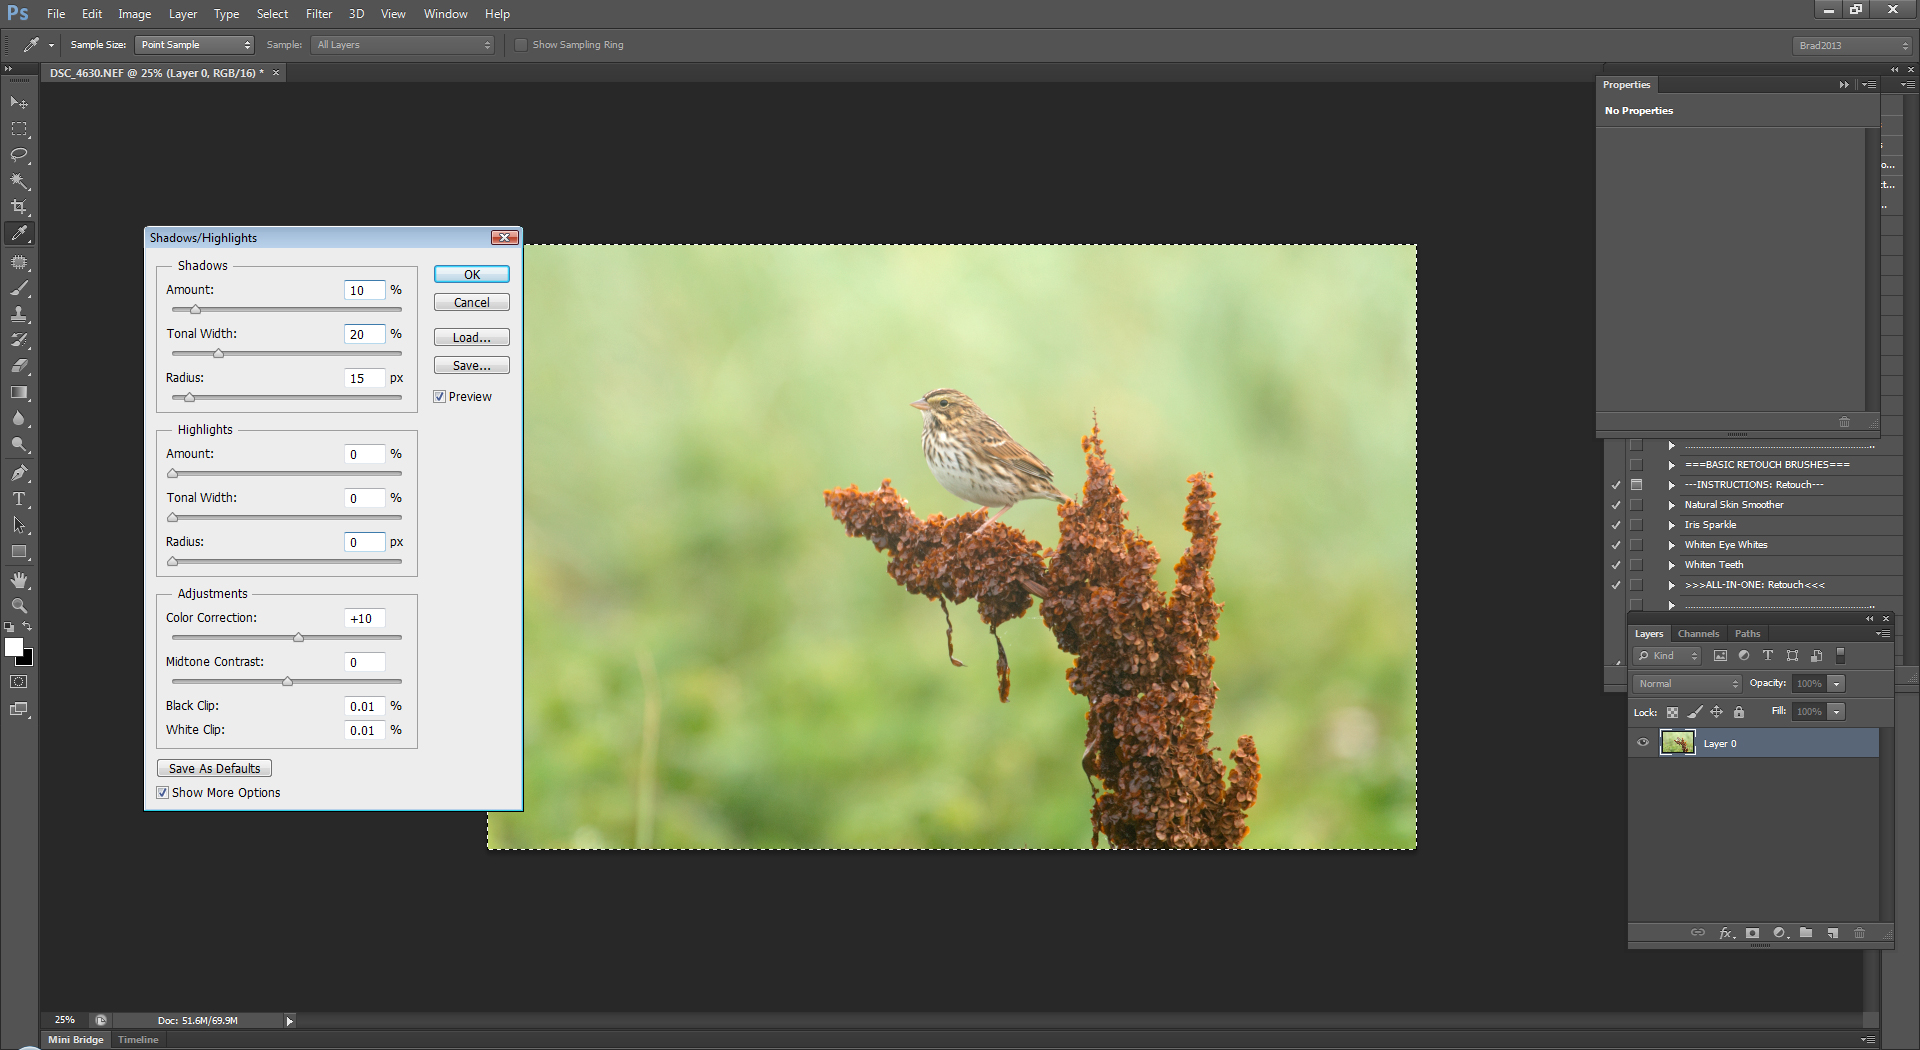
The only settings I personally use are the ones in the Shadows section. I usually set my values at a low level but it all depends on the image and your taste.
First I turned all sliders for the Highlights to the left which will make them all at 0 applying no affect to your image. Then for the Shadows section I usually set Shadows to 10, Tonal Width to about 20 and Radius to 15. Again this all depends on the image so move the sliders around and see what works best for you.
I then turn down the Color Correction under Adjustments to about +10. Again you can play with this and see what affect you like. I personally don't want much color correction because I would do that later with curves or Saturation/Vibrance.
Then click ok and their you have it. In some images like the one shown below (which was taken on a foggy day) you will see a big difference and that extra POP to your image.

If you found this information useful please click the word Likes below. I will try and bring more tips and tricks soon